How to Install Your Milanese Loop Watch Strap In 6 Easy Steps
Share
So, you've bought a Milanese Loop mesh metal strap, you've opened up your package and taken out all the "pieces" but you have no idea how to put it together, attach your new strap to your watch and resize it to fit your wrist size! Fear not - we are here to help!
Follow this super simple six step guide to install your strap and you will be wearing your watch with a beautiful new Milanese Loop strap in no time!
Step 1 - Get Your Parts Ready

Firstly, make sure that you have everything prepared. Within your package you will receive your Milanese Loop strap attached at the buckle and 2 quick release spring bars.
Before you get started, open up the buckle clasp and remove the two ends of the strap from one another. In addition to these provided parts, you will also need to find a small flat headed screwdriver or equivalent suitable tool. You will need this tool to adjust the size/length of the strap. Lastly, remove your old strap (and spring bars) from your watch and you are ready to go.
Now that you have everything ready, we will quickly introduce you to the watch that we will be using for this tutorial - an Omega Seamaster 300 homage built by The Thrifty Gentleman founder, Jonathan.
If you haven't purchased the watch strap already, check out our Milanese Mesh Loop watch strap which can be bought from our online store, for only £9.99.
Step 2 - Install Your Quick Release Spring Bars

Turn both ends of the strap over so you can see the small openings on the pin section as highlighted above. This is where you will insert the quick release spring bars.
Feed the spring bars into the opening . The small "pin" on the spring bar should now be visible in the open gap, and similarly to standard spring bars the ends of the bars should be accessible on the outside of the strap to install to your watch.
Step 3 - Install The Strap To Your Watch

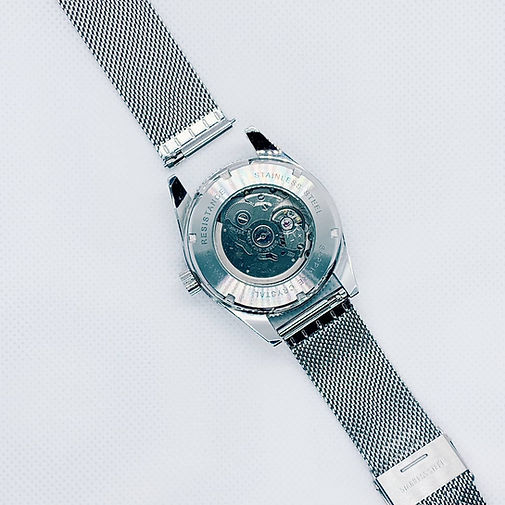
Now this is where you will immediately fall in love with quick release spring bars! No need for a spring bar tool. All you need to do is gently pull the two pins of the spring bars inwards and slide into the lug holes of the watch.
TIP - It may be easier to turn your watch upside down with the dial facing downwards when installing your Milanese Loop watch strap so you can see your quick release mechanism as you are attaching the strap.
Step 4 - Hold On... Have I Attached My Strap The Right Way Around?


Ok, this may not be an important process step for everybody but we know from personal experience how annoying it is to attach a strap and find you have done so the wrong way around. With the Milanese Loop strap, this may not just be the wrong way around, but also top part on the bottom and vice versa!
So, above are 2 pictures that show the correct way to install the strap. Feel free to double check your installation at this stage...
Step 5 - Adjust The Length Of Your Strap


Ok, you're almost there. The last thing you need to do is adjust the clasp so that your strap is the perfect length. The great thing about this Milanese Loop mesh strap is you can make really small incremental changes to the strap length to find that absolutely perfect fit for you.
To begin with, lift the clasp "holder" so you have access to the rest of the clasp (in picture 1). Now you have visibility of the clasp mechanism, position your small screwdriver inside the notch of the clasp mechanism (in picture 2) and use it as a lever to release the clasp mechanism (in picture 3).
Once you have done that, the clasp can easily move up and down the strap allowing you to obtain the ideal strap length.
Now slide the clasp to your required size and once in position, use your screwdriver again to close the clasp, ensuring it is fully clipped back into place. Et voila...
Step 6 - You Are Done!

Congratulations - it's time for you to pat yourself on the back and start to enjoy your new watch strap!
If this article has inspired you to expand your Watch Strap collection further, maybe with one of our other most popular watch straps, check out all of our Best Sellers.
Thank you for reading this article and we hope it helped!
